Getting Started
This tutorial walks you from a fresh account to a running PyTorch training job on the Slices AI infrastructure. It uses a single running example throughout: training a ResNet-18 on CIFAR-10.
By the end you will have:
verified GPU access interactively in JupyterHub,
submitted a non-interactive batch training job via the CLI,
and retrieved the results from shared project storage.
Note
How the system works in one paragraph. The Slices AI infrastructure runs your code inside a Docker container — a self-contained bundle that includes the OS, CUDA toolkit, Python, and all your libraries. You pick a pre-built image (for example, one that already contains PyTorch), attach persistent storage volumes for your data and checkpoints, and specify the command to run. The system schedules the job on a GPU node, runs it, and stores the output. Nothing is installed interactively at runtime; your environment is fully defined by the image you choose.
New to Docker? This is explained in more detail in the concepts page.
Step 1 - Get a project
The Slices AI infrastructure requires you to be a member of a project on the Slices Portal.
Request a new project (e.g. a project dedicated to your PhD research), or
Request to join an existing project if you are collaborating with others.
Each project gets its own separate storage on the Slices AI infrastructure that all project members share.
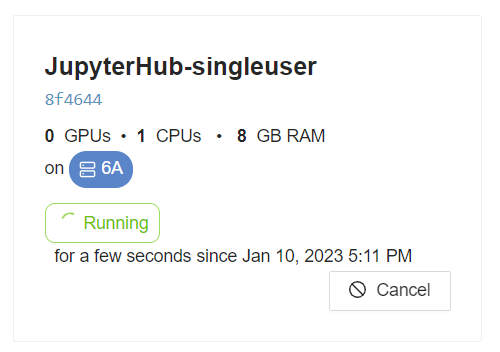
Step 2 - Explore the Slices AI infrastructure interactively with JupyterHub
Before writing a batch job, get familiar with the environment interactively. JupyterHub launches a notebook session directly on the GPU hardware — the same hardware your batch jobs will use — so you can prototype, inspect data, and iterate quickly without the submit-wait-check cycle.
Go to https://jupyterhub.ai.slices-ri.eu and log in.
On the spawn page, select:
Project: your project.
Docker image: PyTorch Stack - CUDA12 image (
gitlab.ilabt.imec.be:4567/ilabt/gpu-docker-stacks/pytorch-notebook:cuda12.6-latest)Resources: 1 GPU, 2 CPUs, 4 GB RAM.
Storage: mount
/project_ghent(Ghent-based clusters) or/project_antwerp(Antwerp-based clusters). This persistent storage is where you will save scripts and outputs.
Click Start.
In a notebook cell, confirm that PyTorch can see the GPU you requested:
import torch
print("CUDA available:", torch.cuda.is_available())
print("GPU name:", torch.cuda.get_device_name(0))
Expected output:
CUDA available: True
GPU name: NVIDIA GeForce GTX 1080 Ti
If
CUDA availableisFalse, double-check that you selected at least 1 GPU on the spawn page and that you used a GPU-enabled image.Try a minimal training step to confirm end-to-end GPU execution:
import torch, torchvision, torchvision.transforms as T

device = torch.device("cuda")
model = torchvision.models.resnet18().to(device)
x = torch.randn(4, 3, 224, 224, device=device)
y = model(x)
print("Forward pass shape:", y.shape)  # torch.Size([4, 1000])
If this runs without error you have confirmed GPU access end-to-end. You can now close the JupyterHub session (
File → Hub Control Panel → Stop My Server) and move on.
Step 3 - Write your training script
Note
For the rest of the tutorial, we will use the cheap 1080Ti GPUs which are available in cluster 4, located in Ghent. This means that we will use the /project_ghent permanent storage for all our files.
You can adapt the tutorial to other clusters and GPUs, but you will need to adjust the storage paths.
Save the script below as /project_ghent/cifar10/train.py from a JupyterHub terminal (File → New →
Terminal), or transfer it with rsync/SFTP from your laptop (see the CLI reference for
file transfer commands).
"""
ResNet-18 on CIFAR-10 — Slices AI infrastructure tutorial example
------------------------------------------------------------------
Saves checkpoints to /project/checkpoints/ after every epoch.
Resumes automatically from the latest checkpoint on restart.
Downloads CIFAR-10 to /project/data/ on first run.

Usage (inside the job container):
    python /project/cifar10/train.py
"""

import os
import glob
import torch
import torch.nn as nn
import torch.optim as optim
import torchvision
import torchvision.transforms as T

# ── Paths (all under the mounted project storage) ──────────────────────────────
DATA_DIR = "/project_ghent/data"
CKPT_DIR = "/project_ghent/checkpoints"
os.makedirs(DATA_DIR, exist_ok=True)
os.makedirs(CKPT_DIR, exist_ok=True)

# ── Hyperparameters ────────────────────────────────────────────────────────────
EPOCHS = 10
BATCH_SIZE = 128
LR = 0.01

# ── Data ───────────────────────────────────────────────────────────────────────
transform_train = T.Compose([
    T.RandomCrop(32, padding=4),
    T.RandomHorizontalFlip(),
    T.ToTensor(),
    T.Normalize((0.4914, 0.4822, 0.4465), (0.2023, 0.1994, 0.2010)),
])
transform_val = T.Compose([
    T.ToTensor(),
    T.Normalize((0.4914, 0.4822, 0.4465), (0.2023, 0.1994, 0.2010)),
])

train_set = torchvision.datasets.CIFAR10(
    root=DATA_DIR, train=True, download=True, transform=transform_train)
val_set = torchvision.datasets.CIFAR10(
    root=DATA_DIR, train=False, download=True, transform=transform_val)

train_loader = torch.utils.data.DataLoader(
    train_set, batch_size=BATCH_SIZE, shuffle=True, num_workers=4, pin_memory=True)
val_loader = torch.utils.data.DataLoader(
    val_set, batch_size=256, shuffle=False, num_workers=4, pin_memory=True)

# ── Model ──────────────────────────────────────────────────────────────────────
device = torch.device("cuda" if torch.cuda.is_available() else "cpu")
print(f"Using device: {device}")

model = torchvision.models.resnet18(num_classes=10).to(device)
criterion = nn.CrossEntropyLoss()
optimizer = optim.SGD(model.parameters(), lr=LR,
                      momentum=0.9, weight_decay=5e-4)
scheduler = optim.lr_scheduler.CosineAnnealingLR(optimizer, T_max=EPOCHS)

# ── Resume from checkpoint if one exists ──────────────────────────────────────
start_epoch = 0
checkpoints = sorted(glob.glob(os.path.join(CKPT_DIR, "epoch_*.pt")))
if checkpoints:
    latest = checkpoints[-1]
    print(f"Resuming from {latest}")
    state = torch.load(latest, map_location=device)
    model.load_state_dict(state["model"])
    optimizer.load_state_dict(state["optimizer"])
    scheduler.load_state_dict(state["scheduler"])
    start_epoch = state["epoch"] + 1

# ── Training loop ──────────────────────────────────────────────────────────────
for epoch in range(start_epoch, EPOCHS):
    model.train()
    total_loss = 0.0
    for inputs, targets in train_loader:
        inputs, targets = inputs.to(device), targets.to(device)
        optimizer.zero_grad()
        loss = criterion(model(inputs), targets)
        loss.backward()
        optimizer.step()
        total_loss += loss.item()
    avg_loss = total_loss / len(train_loader)

    # Validation
    model.eval()
    correct = total = 0
    with torch.no_grad():
        for inputs, targets in val_loader:
            inputs, targets = inputs.to(device), targets.to(device)
            preds = model(inputs).argmax(dim=1)
            correct += (preds == targets).sum().item()
            total += targets.size(0)
    val_acc = correct / total

    scheduler.step()

    # Save checkpoint
    ckpt_path = os.path.join(CKPT_DIR, f"epoch_{epoch:02d}.pt")
    torch.save({
        "epoch": epoch,
        "model": model.state_dict(),
        "optimizer": optimizer.state_dict(),
        "scheduler": scheduler.state_dict(),
    }, ckpt_path)

    print(
        f"Epoch {epoch+1}/{EPOCHS} | loss: {avg_loss:.4f} | val_acc: {val_acc:.4f} | checkpoint saved")

print("Training complete.")
The script:
Downloads CIFAR-10 to
/project_ghent/data/on first run (subsequent jobs reuse the cached download).Saves a checkpoint after every epoch to
/project_ghent/checkpoints/.Resumes automatically from the latest checkpoint if one exists, so a job restart does not lose progress.
Logs one line per epoch to stdout, which the Slices AI infrastructure captures and makes available via
slices ai output.
Important
Everything saved outside a mounted storage path (e.g. outside /project_ghent) is lost when the job
ends. Always write checkpoints, logs, and results to the mounted project storage.
Step 4 - Install and configure the CLI
The CLI is the primary tool for submitting and managing batch jobs.
Install
pip install slices-cli-ai --extra-index-url=https://doc.slices-ri.eu/pypi/
Verify the installation:
❯ slices ai --help
Log in
Authenticate with the Slices portal. This opens a browser window where you complete the OAuth flow:
❯ slices auth login
Please go to https://portal.slices-ri.eu/oauth/authorize_device?user_code=FFWK-BJTB and login to continue.
Successfully logged in as 'your_username'
💾 Saved to /home/your_username/.slices/auth.json
Your token is saved locally and reused for subsequent commands. You can verify you are logged in at any time with:
❯ slices auth show
Logged in as 'your_username'
Select your project
All CLI commands operate within the currently selected project. Set it once and it persists across sessions:
❯ slices project use my_phd_project
The current project was set to 'my_phd_project'.
To see which projects you belong to, run slices project list. To check the currently active project, run
slices project show. You can switch projects at any time by running slices project use again.
See the full CLI reference for all commands.
Step 5 - Write the job definition
A job definition is a JSON file that tells the Slices AI infrastructure which image to use, which resources to allocate, which storage to mount, and what command to run.
Save the following as cifar10-job.json on your laptop:
{
    "name": "cifar10-resnet18",
    "description": "ResNet-18 on CIFAR-10 — Slices AI infrastructure tutorial example",
    "request": {
        "resources": {
            "gpus": 1,
            "cpus": 4,
            "cpuMemoryGb": 16,
            "gpuModel": [
                "1080Ti"
            ]
        },
        "docker": {
            "image": "gitlab.ilabt.imec.be:4567/ilabt/gpu-docker-stacks/pytorch-notebook:cuda12.6-latest",
            "command": "bash -c 'python /project_ghent/cifar10/train.py 2>&1 | tee /project_ghent/logs/cifar10-${GPULAB_JOB_ID}.log'",
            "storage": [
                {
                    "hostPath": "/project_ghent",
                    "containerPath": "/project_ghent"
                }
            ]
        }
    }
}
Key fields to understand:
image: the same PyTorch image you used in JupyterHub, so your script runs in an identical environment.
command: runs
train.pyand redirects output to a log file on project storage in addition to stdout (whichslices ai outputreads).storage: mounts
/project_ghentinside the container — where the script reads data and writes checkpoints and logs.gpus / cpus / cpuMemoryGb: request what you need. CIFAR-10 training fits in 1 GPU and 16 GB RAM.
For a complete description of every field, see the Job Definition reference.
Fair use — a quick reminder before you submit
The Slices AI infrastructure is a shared resource. Please keep these ground rules in mind:
Only request what you need. Over-requesting GPUs or memory delays other users’ jobs.
Start computation automatically. Your job command must start the actual computation without any manual interaction — the infrastructure runs it unattended the moment resources are available.
Let your job exit when it is done. Write your job command so that it terminates naturally once computation finishes. Do not leave jobs running idle — this blocks resources for others.
Use checkpoints for long runs. Hardware failures happen. The tutorial script already does this; keep the pattern in your own code.
Split large experiments into smaller jobs where possible: shorter jobs queue and complete faster.
Full details: Fair Use Policy.
Step 6 - Submit the job
Submit
❯ slices ai submit cifar10-job.json
✨ Created Job a1b2c3d4-e5f6-7890-abcd-ef1234567890
The returned UUID is your job ID. You only need to type enough characters to uniquely identify it (e.g.
a1b2c3d4).
Step 7 - Monitor and debug the job
Check status
Via the CLI:
❯ slices ai show a1b2c3d4
      Job ID: a1b2c3d4-e5f6-7890-abcd-ef1234567890
        Name: cifar10-resnet18
      Status: RUNNING
Docker image: gitlab.ilabt.imec.be:4567/ilabt/gpu-docker-stacks/pytorch-notebook:cuda12.6-latest
Via the website: open https://ai.slices-ri.eu and find your job tile. The current status is shown directly on the tile.
A job passes through the following states: QUEUED → ASSIGNED → STARTING → RUNNING →
FINISHED. If resources are busy, the job waits in QUEUED until a slot is available.
Why does my job stay queued for a long time?
When your job is QUEUED, it means it is waiting for the requested resources to become available.
Check cluster availability at https://ai.slices-ri.eu/live/cluster. You can relax the clusterId or
gpuModel constraints, or wait. If you are on a deadline, consider requesting a reservation.
Why does my job fail immediately?
A job can become FAILED either due to an error in your code, or due to an infrastructure-level error
(e.g. GPU failure).
Check the output of your job first:
❯ slices ai output a1b2c3d4
If there is not output, then check the internal Slices AI infrastructure event log for infrastructure-level errors:
❯ slices ai debug a1b2c3d4
Watch live output
Via the CLI:
❯ slices ai output a1b2c3d4
Epoch 1/10 | loss: 1.8432 | val_acc: 0.3521 | checkpoint saved
Epoch 2/10 | loss: 1.5201 | val_acc: 0.4318 | checkpoint saved
...
Via the website: click the job tile to open the job detail view. The Output tab shows the captured stdout of your job, updated live as the job runs.
Monitor resource usage
Via the website: click the job tile to open the job detail view. The Usage Graphs tab shows GPU, CPU, and memory utilisation over time. Aim for GPU utilisation above 80% for efficient use of shared resources. After the job finishes, the General Info tab shows aggregated CPU, GPU, and memory statistics for the full run.
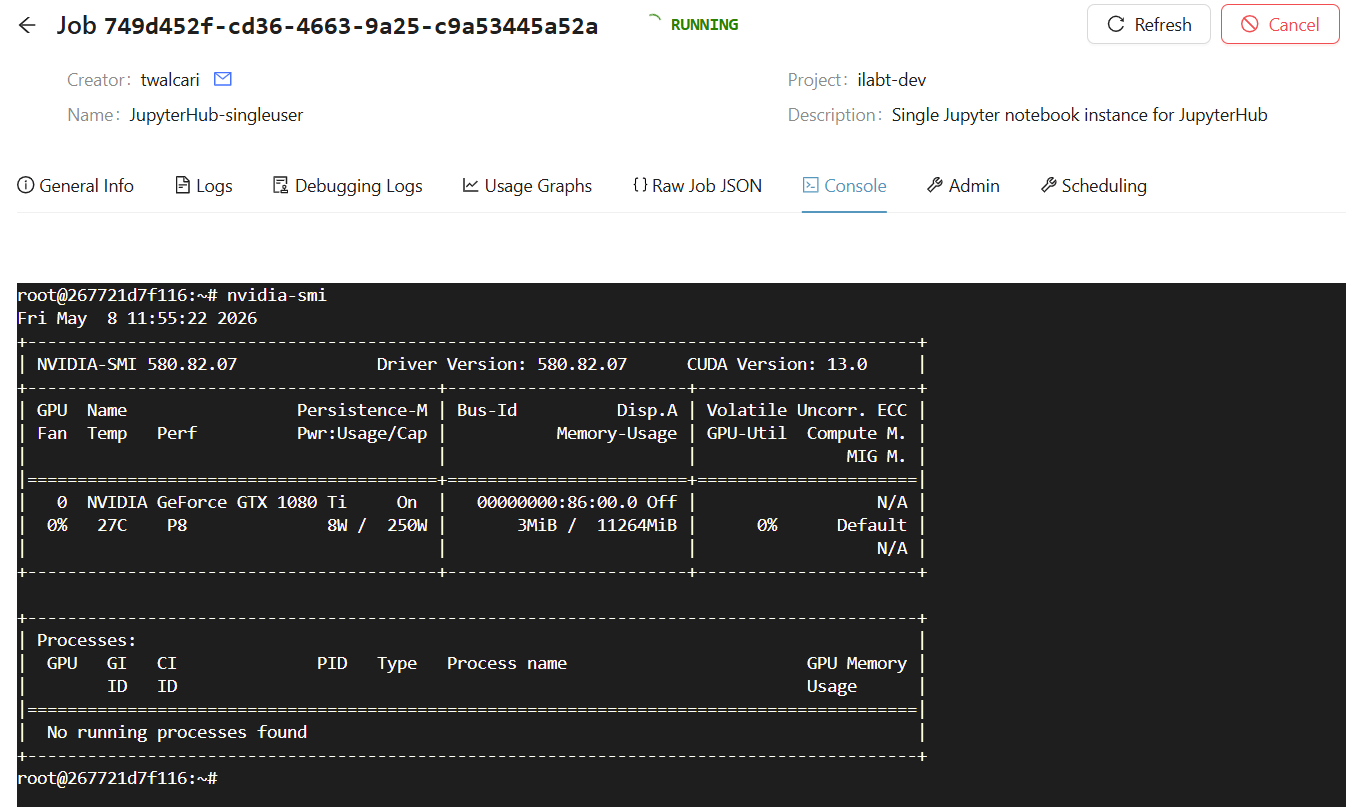
SSH / Console access
Via the website: click the job tile to open the job detail view. The Console tab gives you a terminal directly inside the running container. This is useful for debugging, inspecting logs, or manually running commands.
Via the CLI: you can SSH into the running container with slices ai ssh:
❯ slices ai ssh a1b2c3d4
root@267721d7f116:~# nvidia-smi
Fri May  8 11:55:22 2026
+-----------------------------------------------------------------------------------------+
| NVIDIA-SMI 580.82.07              Driver Version: 580.82.07      CUDA Version: 13.0     |
+-----------------------------------------+------------------------+----------------------+
| GPU  Name                 Persistence-M | Bus-Id          Disp.A | Volatile Uncorr. ECC |
| Fan  Temp   Perf          Pwr:Usage/Cap |           Memory-Usage | GPU-Util  Compute M. |
|                                         |                        |               MIG M. |
|=========================================+========================+======================|
|   0  NVIDIA GeForce GTX 1080 Ti     On  |   00000000:86:00.0 Off |                  N/A |
|  0%   27C    P8              8W /  250W |       3MiB /  11264MiB |      0%      Default |
|                                         |                        |                  N/A |
+-----------------------------------------+------------------------+----------------------+

+-----------------------------------------------------------------------------------------+``
| Processes:                                                                              |
|  GPU   GI   CI              PID   Type   Process name                        GPU Memory |
|        ID   ID                                                               Usage      |
|=========================================================================================|
|  No running processes found                                                             |
+-----------------------------------------------------------------------------------------+
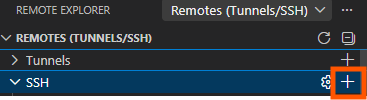
In your favorite IDE: Popular IDEs like VSCode and PyCharm support remote development over SSH.
You can lookup the correct SSH details with slices ai ssh --show command, and then use those to configure your IDE.
This allows you to open files, run commands, and debug directly inside the container from your local IDE interface.
❯  slices ai ssh --no-exec --proxy on --show command a1b2c3d4
ssh -p 5001 -J proxy@bastion2.slices-be.eu root@4a.gpulab.ilabt.imec.be

Step 8 - Retrieve results
After the job finishes, your checkpoints and log file are already in /project_ghent. Open
JupyterHub, spawn a session with /project_ghent mounted, and copy the files you
need from /project_ghent/checkpoints/ and /project_ghent/logs/ via the file browser.
Tip
Once you have copied what you need, delete the data/ and checkpoints/ folders to free up space
on the shared /project_ghent storage:
rm -rf /project_ghent/data /project_ghent/checkpoints
Next steps
JupyterHub — interactive development, TensorBoard, and more.
Job Definition reference — all JSON fields explained.
Storage reference — choosing between
/project_ghent,/project_scratch,tmpfs, and S3.CLI reference — full command reference including file transfer and job management.
GPU software compatibility — which images work on which GPUs.
Fair Use Policy — guidelines for shared-system etiquette.